Your Cart is Empty


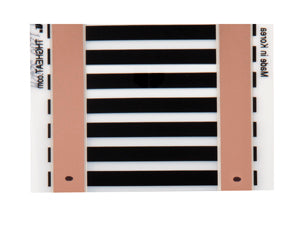
Please note! This set will only work with Redline Science heat tape.
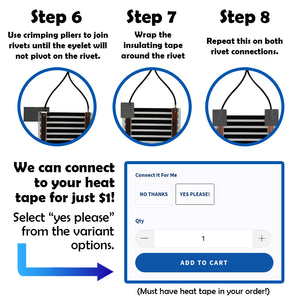
We will be happy to connect your heat tape for you, just be sure to select the connection option.
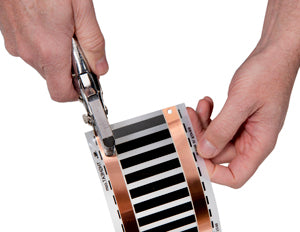
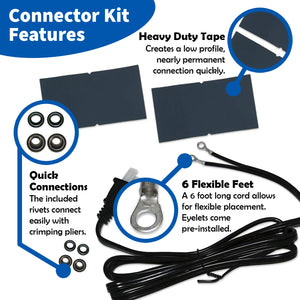
For installing this set we recommend a set of Crimping Pliers for a positive, strong electrical connection.
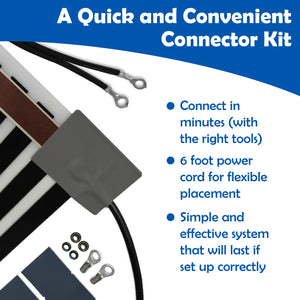
This wire/eyelet/insulator set includes a 6' power cord with the new Redline Science eyelets installed and insulators (2 pcs). This set will make a power connection to one piece of heat tape. If multiple pieces are ordered, each piece will be connected individually. We are unable to connect them in series. Once connected heat tape cannot be returned.
|
|
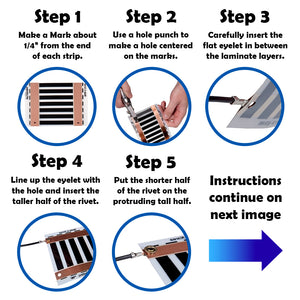
First- you will want to mark your heat tape ends. Make a small mark about 1/4" in from the end on the center of each copper strip. |
|
|
Next- Using a hole puncher (regular school model is fine) punch a hole centered on each of your marks. |
|
|
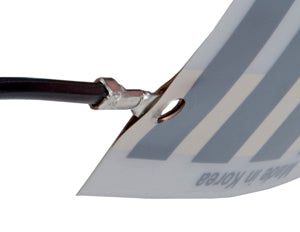
Next- Carefully insert the flat eyelet in between the laminate layers. This sometimes takes a little patience! |
|
|
Next- Line up the eyelet with the hole and insert the taller half of the rivet through the hole. |
|
|
Next- put the shorter half of the rivet on the protruding tall half. |
|
|
Now you will need to smoosh (that's the technical term) the rivet completely. This is best done with the crimping pliers designed for this. You know you have a good connection when you hold the heat tape at the connection and the eyelet cannot pivot on the rivet. |
|
|
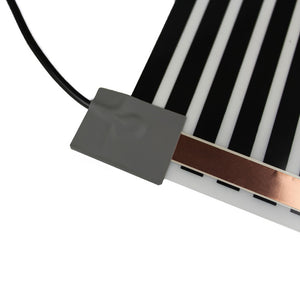
Now you will wrap the insulating tape around the rivet connection, making a heat tape taco. |
|
|
Repeat this on both rivet connections. |
|
|
Fold electrical tape over the copper buss-bar on the non-connected end and you are done! |